Skip to content
GO Map - Unity 3D Asset
  • Tutorials
  • Documentation
  • Try GO Map Online!
Site Search
Uncategorized

Tutorial 04 – Animated character: Idle, Move, Run!

  • March 9, 2018
  • by Alan Grant

In this tutorial I’ll show you how to easily change the GO Map character with an animated 3D model.
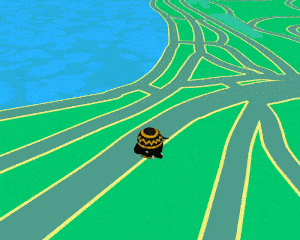
I’m going to use the “Hellephant” model from the Unity “Zombie Toys” game that’s available freely on the asset store.

Bye the way “Zombie Toys” is a very nice project to learn the unity basics and I suggest you to take a look at it.
There’s also a courseware that’s entirely about it’s making and it’s really great.

Why the Hellephant and not the “Zombie Toys” player character?
I mean have you seen it? It’s just so cool.


Set up the character

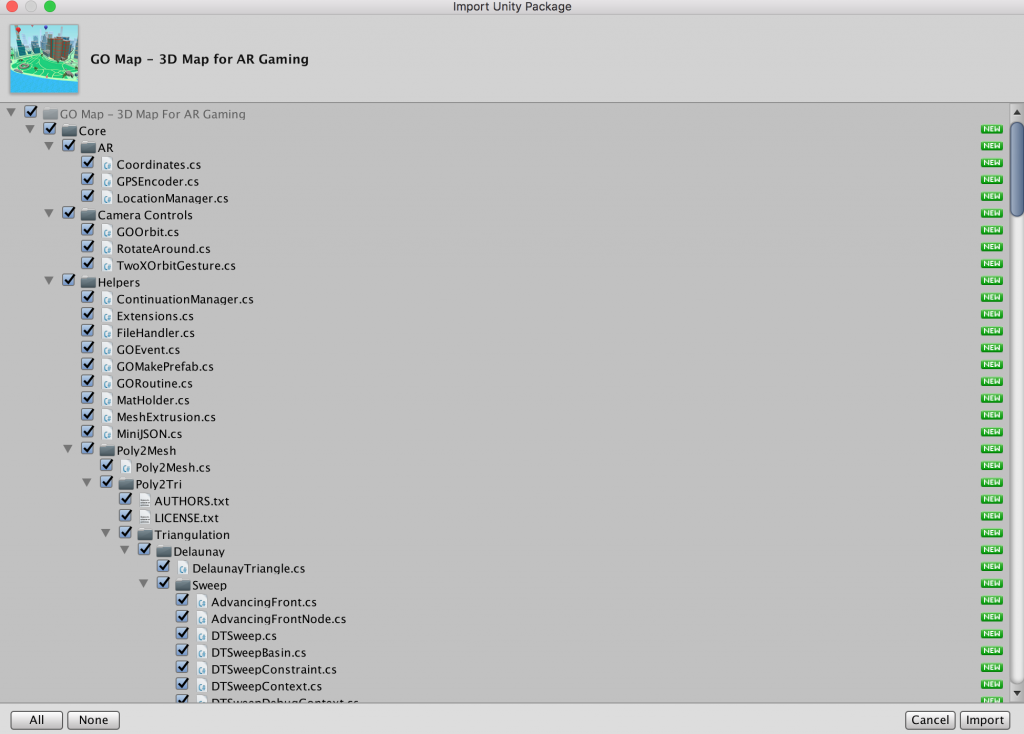
Let’s start by importing the Hellephant model into the project and set up the animator controller. You can import the model wither from the zombie toys project or from this unitypackage.

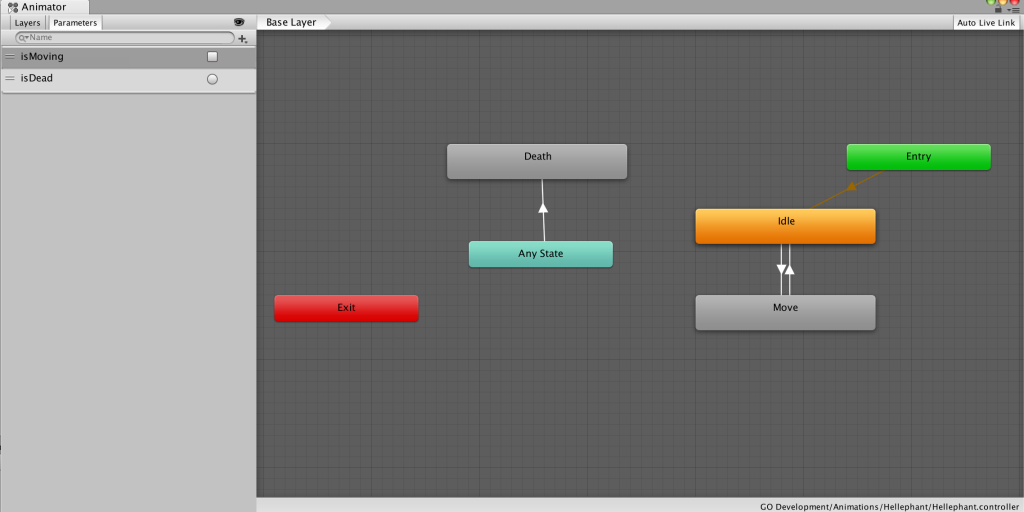
If you use the package above you’ll find everything you need in it, otherwise you’ll maybe need to cut the animations and create an animator controller that looks like this.

*Remember to make the idle and the move animation without exit time and looping*

Set up the scene

Now that you have set up the model let’s import it into the scene as a prefab. However there’s already a scene with everything set up in the unitypackage above.

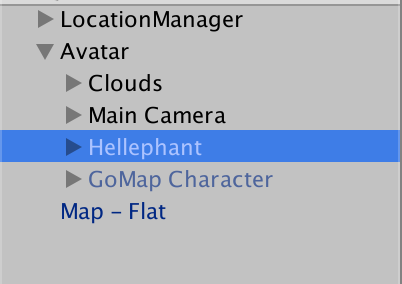
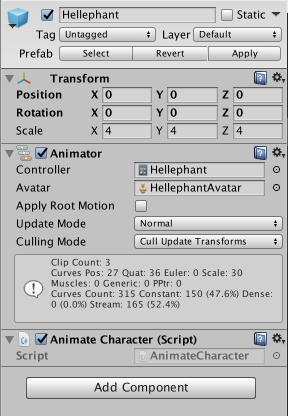
Put the hellephant prefab at the same level of the GoMap Character in the hierarchy. And Check that it’s inspector looks like this, with a “Animate Character” component attached to it.


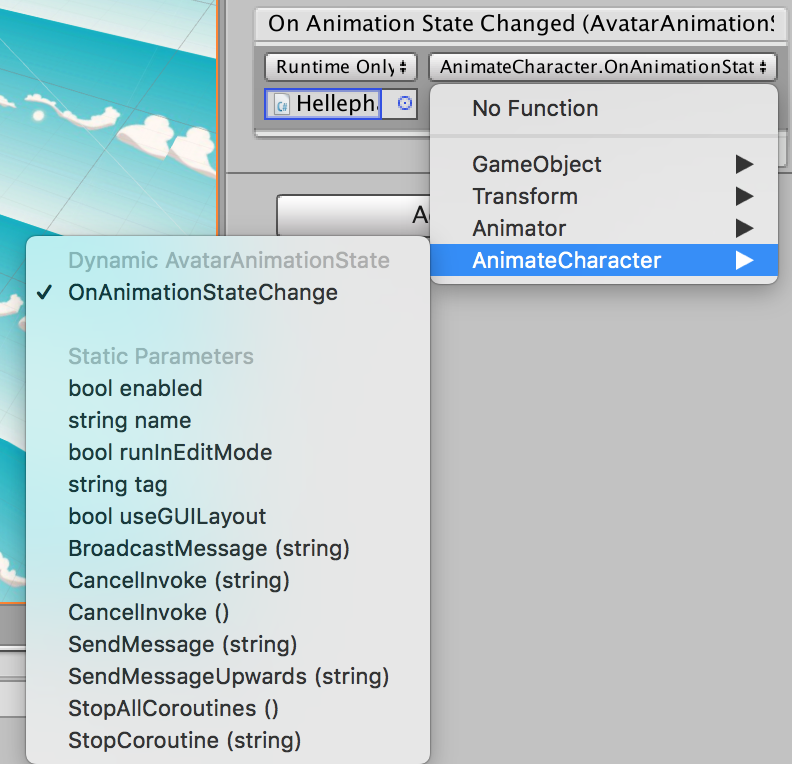
Set up the Avatar: OnAnimationStateChanged Event

Now select the Avatar gameobject in the hierarchy and drag the Hellephant prefab in the “Avatar Figure” property.

In the OnAnimationStateChanged Event Panel at the bottom of the inspector you just have to click on the plus icon to add a new listener, drag the Hellephant gameobject in the object property and select the “OnAnimationStateChange” method of the AnimateCharacter component. That will do the trick, sending animation state change events to our simple script.

AnimateCharacter.cs

1
2
3
4
5
6
7
8
9
10
11
12
13
14
15
16
17
18
19
20
21
22
23
24
25
26
27
28
29
30
31
32
33
using System.Collections;
using System.Collections.Generic;
using UnityEngine;
using GoShared;

public class AnimateCharacter : MonoBehaviour {

Animator animator;

void Start () {

animator = GetComponent();

}

public void OnAnimationStateChange (MoveAvatar.AvatarAnimationState animationState) {

switch (animationState) {

case MoveAvatar.AvatarAnimationState.Walk :
case MoveAvatar.AvatarAnimationState.Run :
animator.SetBool("isMoving", true);
break;

case MoveAvatar.AvatarAnimationState.Idle :
animator.SetBool("isMoving", false);
break;

}

}

}

This script is quite simple. It just implements a method which has a switch for the different animation states and triggers the right animation.
Job done, that easy. The MoveAvatar script basically does all the work for you.
In this way when you move with GPS updates your character will animate accordingly.

The possible states are:

Idle

Walk

Run 

Based on your real world speed. Sadly the hellephant only has a move animation without a run animation.
I’ll leave to you the setup of a model with 3 animations editing the AnimateCharacter script.


Bye
Alan


Uncategorized

GO Map & IndoorAtlas – Getting started

  • February 13, 2018February 14, 2018
  • by Alan Grant

If you don’t know already IndoorAtlas… well you should!

IndoorAtlas is an Indoor Positioning System that will dramatically increase the accuracy of location based applications inside venues, offices and other buildings.

That combined with their recent Unity SDK makes possible developing a new kind of mobile apps oriented toward 3D indoors exploration, mixed indoor/outdoor location based gaming and AR apps.

“Indoor positioning systems (IPS) locate people or objects inside a building using radio signals, geomagnetic fields, inertial sensor data, barometric pressure, camera data or other sensory information collected by a smartphone device or tablet.”


With GO Map 3.1 using IndoorAtlas as the core Location provider is really a matter of minutes. A new IALocationManager.cs will take care of almost everything, giving you complete access to the IndoorAtlas SDK features.

But I really should emphasize another great advantage of using this unity SDK that is having a

NATIVE location API instead of the Unity default one.

In fact IndoorAtlas plugins works really well both in outdoors and indoors, better than than Input.Location api with more accurate location events. So that’s a huge bonus.

In this tutorial I’ll show you step by step how to get started with GO Map and IndoorAtlas.

Start by creating a new Unity project and import GO Map 3.1 from the Unity Asset Store.

Then download the IndoorAtlas Unity SDK from github, that contains this folders…

…and copy the “Plugins” and “androidwrapper” folders to the Asset folder of your new unity project. At this point it should look like this

Open the Plugins folder and delete this classes that are already contained in GO Map 3.1.

Heading
Location
Orientation
Region
Status

Basically everything except for the folders and the IaBehavior.

Search for the “Flat Map – IndoorAtlas” scene and open it.

The main news is that there’s a new kind of Location Manager that will use the IndoorAtlas native location updates to make GO Map and everything else in the scene work.
If you take a look to it you’ll find many of the classic Location Manager features like Zoom Level, World Scale and the desired accuracy.
Of course there still is a location dropdown for In-Editor test runs.

Other than the classic Location Manager Events, all the IndoorAtlas SDK updates are wrapped into Unity Events so that they can be used via Unity Inspector.

Now select the Location Manager Game Object and add another the IaBehavior Component to it. This step is crucial to make it work.

At this point you should make your account on the IndoorAtlas website and follow their walkthrough to get started and make your first location.

Basically you would have to do this simple steps:

  • Register an account
  • Setup the venue and upload your floor plan
  • Map the venue using MapCreator2 for Android

The above is described in more detail in their workflow documentation here.

When you get your API Key and API Secret you can enter them into this component. Also set the Heading and Orientation Sensitivity to 0.001.

This demo scene is nothing more than the classic Flat Map but using the IndoorAtlas SDK updates.
The next steps of this tutorial will show you how to make an iOS build and try it on your phone.

From the iOS player settings set the target minimum version to iOS 8 ore more. That’s a requirement for IndoorAtlas SDK.

Install cocoa pods on your mac. If you haven’t yet, simply type
1
sudo gem install cocoapods
In the OSX Terminal and  press enter.

That will install cocoa pods. And you’ll need it to install the IndoorAtlas iOS SDK in your XCode project.

Build and Run the application

Now one more thing before you go

Open again the OSX Terminal and go your xcode project path.
You can type cd, then drag and drop the xcode project folder and press enter.

At this point type 

1
pod install

 and press enter, this will install the IndoorAtlas.framework into your XCode project.

Now you can open the XCode workspace and build the app to your iPhone/Ipad.

You should see an overall improvement of your GPS position mostly inside the area you have mapped with the IndoorAtlas application.

The next steps could be adding a 3D model of the mapped building/venue to the scene and geolocalize it using the GOObject component.
This is the most frequent use case of GO Map users, but you can find plenty other IndoorAtlas use cases here.


Uncategorized

Tutorial 03 – How to add objects to the…

  • January 15, 2018January 22, 2018
  • by Alan Grant

In this tutorial I’ll show you how easy it is to add your gameobjects to specific latitude/longitude coordinates. I tried to make this kind of operations as close as possible to any other maps sdk that you may already know (iOS Mapkit, Google maps) but I assure that it’s really easy even if GO Map is your first map sdk.

In this tutorial we’re going to make from scratch a script to download features from Google Places.
The script is already contained in GO Map asset but in this tutorial you’ll understand how it works and how to make a similar script to retrieve another POI dataset from your API.

This tutorial will be a lot useful to you to understand how GOMap events works and how you can use them to your purposes.

Why Google Places?

There are many ways to get a dataset of objects that can be displayed on a map, whether if it’s for a location based game or a mobile app. You could use a free online API, build your own one on your server, or just have a local json file with a list of features in it.

But in the end it’s always the same story, you would have a way to query data based on latitude/longitude coordinates and just parse the response to a list of geolocalized objects that you show on the map.

GO Map will ease the process as much as possible but you still have to code a bit, if you want to use your own API.

So in the end: Google Places is just one of the possible apis. I have decided to use it because of its worldwide scale and for the large amount of features you can get from it.

So let’s start from a simple basic scene with GO Map, Avatar, and Location Manager.

You can copy the one used in first tutorial.

Then create a new Game Object and name it GOPlaces. Attach to it a new component named GOPlaces_new and open it in monodevelop.

1
2
3
4
5
6
7
8
9
10
11
12
13
using GoShared;

using System.Linq;

namespace GoMap

{

public class GOPlaces_new : MonoBehaviour {

}

}

Let’s add some public attributes that we will use later like a link to GOMap and a box to enter your Google API key (make one here if you don’t have it already).

Add also a string with the base “nearby search” API url, that’s the one we’re gonna use.

1
2
3
4
5
public GOMap goMap;

public string googleAPIkey;

string nearbySearchUrl = "https://maps.googleapis.com/maps/api/place/nearbysearch/json?";

GO Map events

We are going to make light to how events can be used in unity instead of update loops and other stuff to invoke our methods at the right time.

GO Map offers a handful of useful events that you can use in your own scripts, in this case the  OnTileLoad is the right one.

OnTileLoad is triggered every time a map is created, and a GOTile object is passed in input.

This is the Awake() method of our script in which we register the method “OnTileLoad” of our class to the OnTileLoad event of goMap.

1
2
3
4
5
6
7
8
9
10
11
12
13
14
15
// Use this for initialization

void Awake () {

goMap.OnTileLoad.AddListener ((GOTile) = > {

OnLoadTile (GOTile);

});

}

void OnLoadTile (GOTile tile) {

}

Google Places – Nearby Search API

The nearby search API works receiving in input a center (latitude, longitude), a radius (in meters) and a type of POI we want to receive back.

Beside the “type” attribute we have to get the other two from the tile so that our request will give back only the features that are contained in the map tile.

As you can see from the drawing a tile is rectangular but the Google Places request works with a circular area. That means we have to choose if we want to take the big circle or the smaller one. In the first case we risk to have some features duplicate in various tiles and in the second we risk to miss out some features in the tile corners.

We are going to request for the bigger circle and then try to filter out the features outside the tile bounds.

1
2
3
Coordinates tileCenter = tile.goTile.tileCenter;

float radius = tile.goTile.diagonalLenght / 2;

Let’s also add the “type” public string at the top of your script so we have everything for our request.

Enter the word “Cafe” in the inspector.

IEnumerator, Coroutine and the actual reqeuest

We have now to perform the request to the Google Places API, and this is kinda easy using the Unity WWW API. Just format the url like Google wants and we’re done.

Then we just deserialize the response and we’re (almost) ready to add our places to the map.

1
2
3
4
5
6
7
8
9
10
11
12
13
14
15
16
17
18
19
20
21
22
23
24
25
26
27
28
29
30
31
32
33
34
35
36
37
38
39
40
41
void OnLoadTile (GOTile tile) {

StartCoroutine (NearbySearch(tile));

}

IEnumerator NearbySearch (GOTile tile) {

//Center of the map tile

Coordinates tileCenter = tile.goTile.tileCenter;

//radius of the request, equals the tile diagonal /2

float radius = tile.goTile.diagonalLenght / 2;

//The complete nearby search url, api key is added at the end

string url = nearbySearchUrl + "location="+tile.goTile.tileCenter.latitude+","+tile.goTile.tileCenter.longitude+"&radius="+tile.goTile.diagonalLenght/2+"&type="+type+"&key="+googleAPIkey;

//Perform the request

var www = new WWW(url);

yield return www;

//Check for errors

if (string.IsNullOrEmpty (www.error)) {

string response = www.text;

//Deserialize the json response

IDictionary deserializedResponse = (IDictionary)Json.Deserialize (response);

Debug.Log(string.Format("[GO Places] Tile center: {0} - Request Url {1} - response {2}",tileCenter.toLatLongString(),url,response));

}

}

The request looks like this (add your own API key):

https://maps.googleapis.com/maps/api/place/nearbysearch/json?location=48.8737487792969,2.28790283203125&radius=284.3542&type=cafe&key=ADD_YOUR_API_KEY

Open it in your browser to see the response in json that we are going to parse next.

Basically we have a list of features under the key “results” and for each feature we need just the coordinates and the name, but there’s a lot more if you want dig deeper.

1
2
3
4
5
6
7
8
9
10
11
12
13
14
15
16
17
18
19
20
21
22
23
24
25
26
27
28
29
30
31
32
33
34
35
36
37
38
39
40
41
{
"geometry" : {
"location" : {
"lat" : 48.875352,
"lng" : 2.2867476
},
"viewport" : {
"northeast" : {
"lat" : 48.8767249802915,
"lng" : 2.288019280291502
},
"southwest" : {
"lat" : 48.8740270197085,
"lng" : 2.285321319708498
}
}
},
"icon" : "https://maps.gstatic.com/mapfiles/place_api/icons/shopping-71.png",
"id" : "724b1e420963c6c7949ded2b6cd357214895cad2",
"name" : "Maison Nicoulet",
"opening_hours" : {
"open_now" : true,
"weekday_text" : []
},
"photos" : [
{
"height" : 1365,
"html_attributions" : [
"\u003ca href="https://maps.google.com/maps/contrib/111804204529431767083/photos"\u003eMaison Nicoulet\u003c/a\u003e"
],
"photo_reference" : "CmRaAAAAiaHCTo06DwL2nPFTS1EuQR8eNODuLvrxJcD81hXMFUa_kMYXJwuiTC4yJkSm-ojxiMG92Ldeyo8IDP4soksM5LzqzQNP7ngQj-X_qVxhU5YW9Joj6MwvCJyvSF3FqkYYEhBFYMJRIg61Kbw1hK9NwO51GhR9l3fVONyKZ2XunXaPgZFnGhtX8w",
"width" : 2048
}
],
"place_id" : "ChIJSePmA_Nv5kcRHqg4486X_aU",
"rating" : 5,
"reference" : "CmRSAAAA7jAP9TB_u99rZqt75FGCGRhsZXI5bcX5Pd1gdI41oHrP02qW8wfNdYS2Dkgg48j0hOZZBNLt84M9lx-PdrUb_teU_q4dJ0iYQYctlcejna32_4kgYjgpp5rZoiCczQuWEhCPUk6RxYh8J0XbFIdlpFckGhRF0sghwn6b-LnQJ_G_8pG08F5d3g",
"scope" : "GOOGLE",
"types" : [ "cafe", "food", "store", "point_of_interest", "establishment" ],
"vicinity" : "32 Rue Duret, Paris"
}

Let’s add a public GameObject attribute with the prefab we are going to instantiate for each one of the POIs.

1
public GameObject prefab;

Get the list of places from the response, create a container for the places and set it as a GOTile child. In this way when the tile is destroyed by GOMap it will destroy also all the places.

1
2
3
4
5
IList results = (IList)deserializedResponse ["results"];

GameObject placesContainer = new GameObject ("Places");

placesContainer.transform.SetParent (tile.transform);

That’s how we loop through each place data and spawn our Game Objects.

1
2
3
4
5
6
7
8
9
10
11
12
13
14
15
16
17
18
19
20
21
22
23
24
25
26
27
28
29
30
31
32
33
34
35
36
37
foreach (IDictionary result in results) {

string placeID = (string)result["place_id"];

string name = (string)result["name"];

IDictionary location = (IDictionary)((IDictionary)result ["geometry"])["location"];

double lat = (double)location ["lat"];

double lng = (double)location ["lng"];

//Create a new coordinate object, with the desired lat lon

Coordinates coordinates = new Coordinates (lat, lng,0);

//Instantiate your game object

GameObject place = GameObject.Instantiate (prefab);

//Convert coordinates to position

Vector3 position = coordinates.convertCoordinateToVector(place.transform.position.y);

//Set the position to object

place.transform.localPosition = position;

//the parent

place.transform.SetParent (placesContainer.transform);

//and the name

place.name = (name != null && name.Length >0)? name:placeID;

}

At this point everything works fine and if you run the scene it will look like this

But I really want to dwell for a moment on the Game Object Instantiate and position part of this code.

1
2
3
4
5
6
7
Coordinates coordinates = new Coordinates (lat, lng,0);

GameObject place = GameObject.Instantiate (prefab);

Vector3 position = coordinates.convertCoordinateToVector(place.transform.position.y);

place.transform.localPosition = position;

This four lines are just everything you will ever need to place whatever GameObject onto GOMap.

Whether it’s a little monster, a tree, a flying dragon or the position of another player this is the fastest way to spawn it on the map.

  1. Instantiate a new Coordinate.
  2. Instantiate your game object.
  3. Convert the GPS coordinates to a Vector3 using the method convertCoordinateToVector passing the desired height value at which your game object will be spawned.
  4. Assign the converted vector3 to the transform.position of the new GameObject.

As promised we still have to do a method to filter out the Places outside the current tile, remember?

We are going to use a fantastic property of the Coordinate class that gives the current tile coordinates (in the tile coordinates system) at a given zoom level.

1
Vector2 tileCoordinates = coordinates.tileCoordinates (goMap.zoomLevel);

The returned tile coordinates are just a way to represent the tile in which a given GPS coordinate is in. The zoom level of the map is needed to make this work right.

So basically, if the tileCoordinates are the same as the current GOTile the Place is in the tile, otherwise it’s not.

1
2
3
4
5
6
7
8
9
10
11
12
13
bool TileFilter (GOTile tile, Coordinates coordinates) {

Vector2 tileCoordinates = coordinates.tileCoordinates (goMap.zoomLevel);

if (tile.goTile.tileCoordinates.Equals (tileCoordinates))

return true;

Debug.LogWarning ("Coordinates outside the tile");

return false;

}

That’s it, you will find the GOPlaces script here and in the next release of GOMap.

Or do we want to make things a little bit cooler?

I think we do!

Customize each POI, GOPlacesPrefab.cs component

Let’s add a component to each POI created, storing all the place properties in it.

1
2
3
4
5
if (addGOPlaceComponent) {

place.AddComponent ().placeInfo = result;

}

Then create a new prefab instance that is sort of a coin with a sprite renderer in it.

The GOPlacesPrefab.cs component will take care of the further customization in its start method.

1
2
3
4
5
6
7
8
9
10
11
12
13
14
15
16
17
18
19
20
21
22
23
24
25
26
27
28
29
30
31
public class GOPlacesPrefab : MonoBehaviour {

public IDictionary placeInfo;

public SpriteRenderer spriteRenderer;

public GOPlaces goPlaces;

void Start () {

spriteRenderer = GetComponentInChildren ();

spriteRenderer.sprite = null;

string url = (string)placeInfo["icon"];

StartCoroutine (DownloadIcon (url));

}

private IEnumerator DownloadIcon (string url) {

WWW www = new WWW(url);

yield return www;

spriteRenderer.sprite = Sprite.Create (www.texture, new Rect (0, 0, 71, 71), new Vector2 (0.5f, 0.5f));

}

}

That’s all, I’ve added just a simple cache system for the icons in the final version that you can find here.

Hope this was useful to you,

Let me know if you have questions.

Bye

Alan


Uncategorized

Tutorial 02 – Customize the map

  • December 1, 2017January 15, 2018
  • by Alan Grant

In this tutorial we are going to customize our map style understanding most of the GO Map attributes and settings.

Let’s start with a simple operation: duplicate the scene used in the previous tutorial and put it into a new folder. We are going to create some new materials so you may want to keep things organized.

then rename the scene as you prefer =)

Change Location

In the previous tutorial we have made a valid Mapbox Access token and successfully loaded the map in the editor. If you press play in the new scene you can see the map loads just fine as before.

Before we start customizing the map let’s change the location of the in-editor build with a more tutorial-friendly area: Rome.

Select the LocationManager gameobject in the scene and change the “Demo Location” in the inspector panel to “Rome” using the drop down menu.

Now the map loads a sample location in Rome.

GO Map inspector

Select the Map – Flat game object in the scene and take a look at the GO Map inspector, precisely to the “Layers” attribute.

This is the main customization tool you have to change the map style. As you can see there are 4 entries in the list that represent each map layer: Buildings, Landuse, Water, Roads.

Take “Water” for example that is very basic, all water is blue.

In the “Default Rendering” there are all the basic settings for coloring the most of the layer’s objects. In this case you can see that the attribute “Material” inside the the default rendering is a water material.


Changing the color of that material will change the aspect of every water area of the map.

via GIPHY

The water layer has basically just this simple setting in this theme. But nothing stops you to make a different water material for lakes and rivers from the one used for sea/ocean, for example.


Buildings Layer has quite more settings to tweak. The Default Rendering material is a transparent green. But if you look at the rendered area you’ll see that some buildings are yellow and one is pink.
That’s made using the “Rendering Options” list in which you can set a different style for a particular subset of map objects.
There are already two options set for churches and schools, with two different materials (yellow and pink).  
Clicking on the dropdown list of the “Kind” attribute you’ll see how many different kinds there are to customize, if you want. If you want to make a very complex map style using lots of kinds I strongly suggest you to take a look to the mapzen layers description.

Another important attribute of the building layer is the “polygon height”. That value means how much the buildings are extruded in the map, now it’s 2.
Try to set it to 10 and load the scene again (stop/play), you’ll see that the buildings are taller now.

Not all the buildings though, Churches and Schools stayed flat, because their style overrides every Default Rendering value.

The “Use real heights” checkbox if selected will automatically extrude the buildings with their real values of height. That’s a great feature but sadly that data is not available worldwide, if you use it remember to set also a fixed value of height in case the real one isn’t available.


The Roads layer inspector also features various rendering overrides. This rendering options aren’t aimed to change the roads color or material but just the width.
The default width value is 3 but for almost every road kind has it’s rendering option:

  • Highways: 5, outline 1
  • Major roads: 4, outline 1.5
  • Minor roads: 3.5, outline 1.5
  • Path: 3.5, outline 1.5

Basically the Landuse layer is all the rest that you see in the map, except for the background.
In this theme everything in dark green is landuse layer.

If you take a look at the kinds of the landuse layer you see how many options you have for customizing the map for your game/app.

Last but not least, we have the background, that is the GO Map inspector material attribute named: “Tile Background”. It is the light green of this theme, and it’s the material use for the tiles meshes.


Ok let’s customize GO Map creating a new theme, maybe for a “westworld” game with a lot of desert.

Let’s begin with creating some new materials for the land background, landuse layer and water.

(or get the materials here)


Open the GO Map inspector and add the materials to the Background and the default rendering of Water and Landuse.
Check the checkbox named “disabled” on the Building and Roads layer to render only the layers we are interested in.

Play the scene and this is the result. Interesting.

Now handle the Buildings and the Roads.

Add the materials to the Buildings default rendering and to the rendering options for churches and schools, settings different values of height for default = 3, churches & schools = 20.
Open the Roads layer and remove every Rendering Option, leave only the default Rendering, then set the new roads materials. Width of 3.5 and outline width of 1.

Enable again the Building and Roads layer and press play.

Not bad, now add a final touch:
Open the Landuse layer and increase the “Polygon height” to 2, this will extrude the objects a little.
Now add an override in the Landuse Layer for bridges, with the same Material of the background but with height 0. Just to see the roads over the bridges.

Tip*: Even if there’s no need for this particular location, I suggest to avoid the rendering of “Residential” and “Commercial” landuse kind.
Open the Landuse layer and simply add the new kinds in the “Avoid” list

I think the map looks pretty good already like this, but you could play a lot more with materials and shaders, lighting and all the other wonderful instruments that unity offers.

Download the scene

Hope you’ve found this tutorial useful, these are the complete settings for this scene:

  • Background: Desert land
  • Buildings
    • Material: Desert Building
    • Height: 3
      • Override for School
        • Material: Desert Building
        • Height: 20
      • Override for Church
        • Material: Desert Building
        • Height: 20
  • Landuse
    • Material: Desert Dark
    • Height: 2
      • Override for Bridge
        • Material: Desert land
        • Height: 0
  • Water
    • Material: Desert Water
    • Height: 0
  • Roads
    • Material: Desert Roads
    • Outline Material: Desert Outline
    • Height: 0
    • Line width: 3.5
    • Outline width: 1
Uncategorized

Tutorial 01 – Getting Started

  • November 29, 2017February 7, 2018
  • by Alan Grant

GO Map is a project started over a year ago (summer 2016) to help every developer who wants to build a location based game in Unity 3D.
When pokemon go was released I noticed that among the thousands of plugins on the Unity Asset Store there wasn’t basically anything related to maps and absolutely nothing closer to the map of the famous Niantic game.

The goal of this project is to let developers build location based games without having to think at the map part at all. With GO Map you won’t have to code again a 3D map for your game (And trust me it’s a lot of time saved) letting you focus 100% on your game logic.

Let’s start this series of tutorials with the basics.
Download GO Map, import it in a new project and build on a mobile device using real GPS information.

Make a new Unity Project

Possibly using Unity 2017.1 or higher make a new project in the folder you want.

Download GO Map

Open the Asset Store window from within Unity 3D (Window/Asset Store)…

…And search for “gomap”.

Click import and make sure that all files are selected, then click import again.

If you are using a newer version of unity it will ask you to update the API used, click yes and don’t worry =)

Open a demo scene

Navigate the GO Map folder and open the “Flat Map – Pokèmon GO Style” demo scene.

At this point you’ll notice that there are some Game Objects in the scene, they are all well covered in the GO Map documentation so right now let’s focus to the most important and make a quick build.

Select GO Map and take a look at the inspector panel. You’ll see that there are 3 input fields to insert API key for Mapbox, OSM or Mapzen_legacy (if you have your own mapzen server), and they are all marked by a red !.
That means it’s time to make your own map API key, choosing one service among the 3 listed above.
I will show you how to make an API key for Mapbox, but it’s really the same for the other two services.

Make a Mapbox Access token

Open your browser and make a Mapbox account on their website: https://www.mapbox.com/account/

Once you have an account you can open the dashboard and receive your own access token. Copy it to the clipboard and go back to Unity.

Run GO Map in the editor

Paste your Mapbox Access token in the input field named “Mapbox_access_token” of GO Map (script). Then press play and you’ll see the map will load fine inside the editor.

The location used for editor builds is set inside the LocationManager (script) on the Location Manager GameObject. Feel free to try other location if you want.

Build the scene on your phone

Building this scene to your smartphone will use its GPS device. That preference is also set in the LocationManager inspector and it’s named “Use Location Services”.

So open the Build Settings from the File/Build Settings menu and add this scene to the build by clicking on the “Add Open Scene” button.

Select the player you want to use (Android/iOS) and open the Player Settings.

Change the “Package Name” to a different value than default like for example “com.gomap.demo” and you are good to GO.


Android
Just press build and run on with the device attached to your computer.


iOS
If you are building to iOS please add the “Location Usage Description” in the player settings. This will include in the generated .plist file the string to prompt when requesting Location Permission. Keep in mind that without this string your app won’t have permission to use GPS.

Press build and run with the device attached to your computer. If something goes wrong press build again from the generated XCode project.

That’s it, now you have GO Map working with real GPS on your mobile device.


Tips

  • Disable V Sync in quality settings for faster map loading.
  • Increase quality level for each player (ios/android) to have better looking graphics.

Uncategorized

GO Map Web Demo

  • November 28, 2017January 30, 2018
  • by Alan Grant

Try out GOMap most famous style “Flat Map” in this web demo!
Feel free to search for any address or input GPS coordinates (lat,lng format) in the searchbar and see how is the rendering for that area.

This demo is made using Unity WEBGL Player, so please use one of the supported browsers.
Chrome works great

Move around using: W, S, A, D
Orbit and zoom: Mouse
Map API used: Mapbox

Already in love with GO Map? Unity Asset Store

Want to know more? Read documentation.

You may find it a bit laggy, that’s because of the lack of multithreading in the webgl player.
There’s absolutely no lag when building on smartphones or any other multithreaded device.

Recent Posts

  • Tutorial 04 – Animated character: Idle, Move, Run!
  • GO Map & IndoorAtlas – Getting started
  • Tutorial 03 – How to add objects to the map
  • Tutorial 02 – Customize the map
  • Tutorial 01 – Getting Started
GO Map - 3D map for AR gaming, 2017
Theme by Colorlib Powered by WordPress